fbpx

Product Support

This certifies that your product is warranted to be free from defects in material and craftsmanship under normal use and service for the lifetime of the original consumer. If your product has a heat control or cord, such specific component parts are warranted for one (1) year from the date of purchase.


If warranty service should be necessary, please contact Estherbrook at 27 N. Morain St, Kennewick, WA 99336 for instructions. We will need to have your proof of purchase, name, address, telephone number, and a description of the claimed defect. Any products, including any part or parts, which, upon examination by the manufacturer, are found to be defective will be repaired or replaced with a comparable product or part without charge during the warranty period. You assume risk of loss or damage to products, and you are responsible for the costs of shipping and handling, when products are shipped from you to us for warranty service and when repaired or replaced products are shipped back to you, regardless of whether this warranty is found to apply. The limited warranty period for any product repaired or replaced under this limited warranty shall be the remainder of the original warranty.


EXCLUSIONS: This warranty does not apply to damage caused by accidents, misuse, abuse, commercial use, neglect, tampering, alterations, ordinary wear and tear, damage in transit, damage due to environmental or natural elements, or service by unauthorized personnel. Product that has been damaged by use with excessively high heat; or product that is flaking (exclusion applies to stainless steel products only), stained, discolored, marked, scratched, warped, or pitted indicates use other than that recommended by the manufacturer, will not affect the performance of the product, and is not covered by this warranty. Further warranty information can be obtained from our Consumer Service Department.


This warranty is limited to the original consumer with proof of purchase and is not transferable. If the product was not purchased new from the manufacturer or an Authorized Dealer, Distributor, or representative of the manufacturer, this warranty is null and void.


The manufacturer reserves the right to utilize comparable reconditioned, refurbished, repaired, or remanufactured products or parts in the warranty repair or replacement process. Such products and parts will be comparable in function and performance to an original product or part and warranted for the remainder of the original warranty period.


LIMITATIONS: THE MANUFACTURER’S SOLE AND EXCLUSIVE LIABILITY UNDER THIS WARRANTY, AND THE CONSUMER’S SOLE EXCLUSIVE REMEDY, IS LIMITED TO THE REPAIR OR REPLACEMENT OF THE DEFECTIVE PRODUCT AT THE MANUFACTURER’S SOLE OPTION. THE MANUFACTURER SHALL NOT BE LIABLE FOR ANY OTHER DAMAGES, INCLUDING, WITHOUT LIMITATION, SPECIAL, INCIDENTAL OR CONSEQUENTIAL DAMAGES, WHETHER DIRECT OR INDIRECT ARISING OUT OF OR IN CONNECTION WITH PRODUCT, ITS USE OR ITS PERFORMANCE. IN NO EVENT WILL MANUFACTURER’S LIABILITY EXCEED THE PURCHASE PRICE PAID BY THE CONSUMER FOR THE PRODUCT(S) AT ISSUE.


Any oral or written description of a product is for the sole purpose of identifying it and shall not be construed as an express warranty. Any assistance the manufacturer or Dealer, Distributor, or Representative provides outside the terms or limitations of this limited warranty will not constitute a waiver of such terms or limitations, or extend or revive the warranty. The limitations in this warranty apply notwithstanding any failure of the essential purpose of the limited remedies. Some states do not allow the exclusion or limitation of incidental or consequential damages, so the above limitation or exclusion may not apply to you.


THIS WARRANTY IS EXPRESSLY GRANTED IN LIEU OF ALL OTHER EXPRESS WARRANTIES. THE DURATION OF ANY IMPLIED WARRANTIES (INCLUDING, BUT NOT LIMITED TO, IMPLIED WARRANTIES OF MERCHANTABILITY AND FITNESS FOR A PARTICULAR PURPOSE) RELATING TO THE PRODUCT IS LIMITED TO THE PERIOD DESCRIBED ABOVE (OR THE ONE-YEAR PERIOD FOR HEAT CONTROL OR CORD). Some states/jurisdictions do now allow limitations on how long an implied warranty lasts, so the above limitation may not apply to you.


This warranty gives you specific legal rights, and you may also have other rights which vary from state to state, or country to country.


Warranty effective date 9/1/2016

Service Warranty Request

Product Support
First
Last

Caring for Your Cookware

Before First Use
Wash each piece of your new Saladmaster cookware, including the detachable handles, in warm, soapy water to which you have added one cup (250 ml) of vinegar per one gallon (3.8 L) of water. This removes all traces of manufacturing oils and polishing compounds. Rinse in clear, warm water and dry thoroughly with a clean, soft towel.
Daily-Use Cleaning
After each use, remove the detachable handles, wash cookware and handles in warm, soapy water, rinse and dry using a clean, soft towel. Your cookware may also be placed in your dishwasher. To maintain a polished finish on the handles, avoid using abrasive cleanser on the handles or cleaning them in the dishwasher.
For Stubborn Stains or Stuck-on Food
Rinse pan with hot water and sprinkle with the Saladmaster stainless steel cleanser that was packed with your cookware, and create a paste. Using a damp paper towel, rub in a circular motion. Wash well in hot, soapy water to remove all cleanser, rinse and dry with a clean towel. Never use steel wool or hard abrasives on the outside surface of the cookware as they might dull the finish.

Proper Use

To Add Saladmaster Detachable Handles
Always attach the handle before using the cookware to cook on the stovetop. Use the long handles only on skillets and sauce pans; short side handles can be used on any utensil. Align the slot in the handle with the fixed stainless steel bracket on the pan. Do not press the button when attaching the handle. Push the handle onto the stainless steel bracket until it snaps in place.
To Remove Detachable Handles
Always remove the handles before using the utensil in the oven, under the broiler or washing the pan in the dishwasher. Holding onto the opposite side of the pan, using the other hand, press downward on the button of the handle and pull outward to remove. Never force the handle.
Transporting Cookware
Always transport the cookware with the required number of handles securely and properly attached in an upright position.
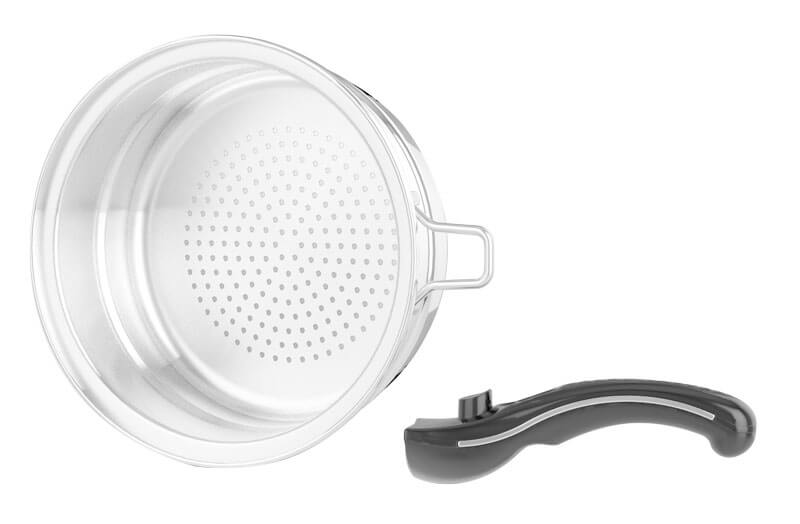
Saladmaster Perforated Basket
Cooking with Low

Use only medium and low heat settings as high heat is not required when using Saladmaster cookware. All you need to know is Medium – Click – Low. Preheat pans over medium heat, according to your electric range setting. If necessary, use lower settings to control temperature. On a gas range, medium is when the flame reaches halfway to the bottom of the pan. When the Vapo-Valve clicks, then turn the temperature setting to low. On an electric range, that should be set at the lowest temperature setting. On a gas range it is the lowest flame without going out. If your lowest flame is still too high, then use a heat-reducing ring or diffuser pad between the burner and the pan. The use of excessive heat for long periods of time can cause a pan to warp.

Oven Cooking
Always remove the handles from your cookware before placing cookware in the oven, under a broiler or washing them in a dishwasher or sink. When using a cover with the knob, do not exceed 350°F (177°C) in the oven. Always use pot holders to handle a pan that has been in the oven or under the broiler. Never use the cover under a broiler.
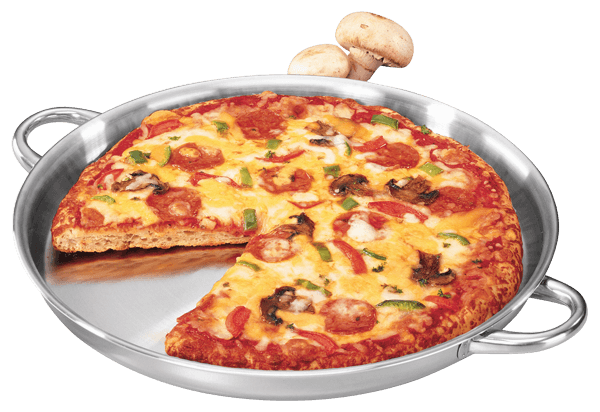
Deep Dish Pizza
Cooking with Salt
When adding salt to water or other liquids, bring liquid to a boil first and then add salt. Salt can pit and damage the surfaces. This damage is not covered by the Saladmaster Warranty.
Preheating
Preheating a pan may take two to five minutes. A pan is properly preheated, when a few drops of water sprinkled on the surface bead and dissipate.
Warping
Adding cold water or frozen food into a hot pan, or putting a hot pan into cold water could cause warping. Sudden changes of temperature may cause any metal to warp, resulting in an uneven bottom. Warping is not covered by the Saladmaster Warranty
Proper Seal
Always make sure that the rim of the cover and the rim of the pan remain free of food. This is very important in obtaining the proper seal between the cover and the shoulder of the pan. The Vapo-Valve is designed to click when the food or liquid inside the pan reaches the ideal cooking temperature, approximately 187°F (86°C). This is the signal to turn the heat to low.
Discoloration on Cookware
It is possible that a piece of cookware will turn blue on the bottom, or even on the inside. This blue tinting simply means that high heat has been used for an excessive amount of time. You can scorch anything, even Saladmaster cookware, by using high heat. If this occurs, rest assured that it will eventually fade away. Remember, you have not harmed the cookware; you have simply burned the metal. Keep in mind; it is never necessary to use high heat, even when boiling water. Sometimes a white film will appear on the inside bottom of the cookware. This is primarily sodium cooked out of foods and calcium deposits that the dishwater will not remove. Use the Saladmaster cleanser. Likewise, any burned-on grease or carbon deposits on the bottom of your cookware can be removed with the use of Saladmaster cleanser.
Cookware Finish
To avoid scratching the finish, use a damp paper towel with the cleanser. It is abrasive enough to clean the inside and bottom of the cookware without scratching the sides or inside top of the covers. To keep the cookware exteriors looking new, avoid using an abrasive on the outside finish. If you want to use a soap-filled scouring pad on the inside, feel free to do so, but not on the exterior of the pan. If foods stick on the inside of the pan, add hot water and let stand for 10 minutes before cleaning with Saladmaster cleanser. Follow cleaning instructions on the container of Saladmaster cleaner. To purchase additional Saladmaster cleaner, visit Saladmaster.com or contact your local Dealer.
Selecting the Right Size Pan

Saladmaster cookware performs best when you select the right size pan. You’re using the right size to activate the Vapo-Valve if it’s at least two-thirds full.

Cooking Basics

Roasting Meats on the Stovetop
Preheat roaster or skillet over medium heat two to three minutes until a few drops of water splashed on the surface bead and dance. Place meat firmly into preheated utensil and press down to ensure even searing. Brown the meat on all sides. The meat may stick, but will loosen as it is browned. Do not add liquid (unless recipe calls for it). Cover utensil and cook over medium heat. When the Vapo-Valve clicks, reduce heat to low and cook according to times listed in the recipe, or remove the handles and finish cooking in the oven as directed in recipe, or use this chart as a guide.
  • Beef
    rare, 10 minutes; medium rare, 12 minutes; medium, 15 minutes; well-done, 20 minutes
  • Lamb, leg
    rare, 20 minutes; medium, 25 minutes; well-done, 30 minutes
  • Pork
    25-30 minutes
  • Veal
    20 minutes
Fried Foods Without the Fat
Any meat, including chicken with or without skin, can be “fried” in your Saladmaster cookware without added fat or oil. The secret is in preheating. Preheat the large or small skillet over medium heat two to three minutes until a few drops of water splashed on the surface bead and dance. Place meat firmly into preheated skillet and press down to ensure even searing. Brown the meat or chicken on all sides. If additional cooking is required, place the cover slightly ajar on top of the skillet and cook to desired doneness. Always choose the skillet large enough to hold the meat without crowding or cook the meat in small batches if necessary
Stack Cooking
Have you ever needed just one more burner? Next time, try stack cooking! Stack cooking can provide that extra burner you need, thus allowing you to prepare two or more dishes while utilizing just one burner. The Saladmaster cooking system is specifically designed to provide even heat distribution and the vacuum seal required for stack cooking. First, start cooking over medium heat. When the Vapo-Valve clicks, simply turn off the burner and immediately stack the pan on top of a pan that is already cooking over another burner. Thanks to the built-in core layer that evenly conducts heat across the bottom, up the sides, and through the cover, each piece of cookware becomes a little oven of its own, with the top piece of cookware becoming nearly as hot as the bottom piece.

Frequently Asked Questions

Can I put Saladmaster cookware in the dishwasher?
Yes. We recommend that the removable handles be hand washed as repeated washing in the dishwasher may dull the handles. We recommend that you avoid the heat-dry cycle of the dishwasher by using the energy-efficient air-dry cycle.
After I’ve lowered the heat and the seal has formed, can I lift the cover?
Peek if you must. After replacing the cover, spin it so that the Vapo-Valve clicks, indicating that it has resealed itself. If it does not increase the heat until the valve clicks then reduce the heat to low.
What if my range cooks at a higher temperature than normal?
If your lowest temperature setting is still too high, you may need to purchase a heat-reducing pad for your burner, such as the type used under glass coffeepots on electric ranges.
Can I ever cook over high heat?
High heat may cause warping. Also, foods are more likely to stick or scorch over high heat, and cooking at a too high heat can cause food to shrink and become dry. It is okay, however, to bring large amounts of liquid to a boil, such as water for pasta, over medium-high heat. Reduce the heat after the boiling point has been reached.
Can I carve a roast in the pan?
To maintain your cookware’s finish, it is recommended that foods be removed to a cutting board for carving. Foods may be returned to your cookware for serving.
Why does the Vapo-Valve click as soon as I turn the heat on under a covered pan? Should I lower the heat at that time?
The Vapo-Valve is designed to click when the food or liquid inside the pan reaches approximately 187°F (86°C). Occasionally, slow clicking begins before the pan has been exposed to heat long enough to reach that level. When that happens, proceed as you would without the premature click. The click should stop as the heat rises. Once the temperature reaches approximately 187°F (86°C), the Vapo-Valve will click again. This time, the click will be more rapid and insistent, and it is time to reduce the heat to low.